Before we start our through hole soldering, turn on your soldering iron or soldering station and let it warm up. Most soldering stations and irons will get hot enough to solder within a couple of minutes. Make sure the tip of the soldering iron is clean.
Also make sure you have a fan on or plenty of ventilation.
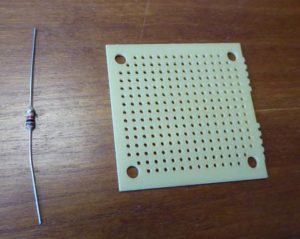
Here we will solder a resistor onto a perfboard.
First we take the leads of the resistor and bend them down.

Then we put the leads through the perfboard so that they stick out of the copper coated side. Then we bend the leads outward, so the resistor will stay in place. We want the actual resistor to end up as close to the board as possible.

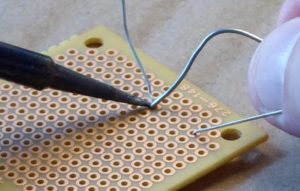
Next we get ready to solder, with the copper side of the board facing up.

Then we hold the solder in one hand and the soldering iron in the other. Touch the tip of the soldering iron to the copper pad that the resistor lead is sticking out of. The tip should touch both the copper pad and the lead from the resistor.

Hold the tip here for roughly 3 or 4 seconds before applying the solder.
It may take a second or two before the solder start to flow. You want enough solder to cover the copper pad and firmly adhere to the lead. I generally pull my hand with the solder away first and then try to pull the iron straight up or along the path of the lead when done soldering.
Great! You are now done with the first lead. At this point you either can put the soldering iron back in it’s holder and inspect your work up close to make sure it is ok or go one and solder the second lead. A good solder joint should look like a chocolate kiss or a volcano.
Once you are done soldering clip the leads as close to the top of the solder as possible.

You should practice through hole soldering several times before working on a real project. Make sure you can solder so the solder does not stray to other copper pads and is only on the one with the lead through it.